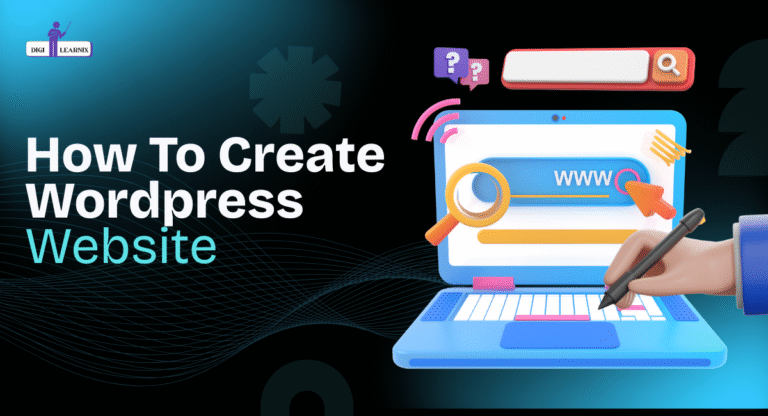
आज के समय में हर business, freelancer, coach या student को ek website ki zaroorat होती है. Lekin sabse bada sawaal hota hai — WordPress Website Kaise Banaye? Agar aap bhi naye ho aur website banana chahte ho lekin coding nahi aati, to chinta mat karo. WordPress ek aisa platform hai jisme aap bina coding ke apni professional website बना सकते हो.
Is blog mein aapko step-by-step poora process samjhaya gaya hai — domain lena, hosting setup karna, WordPress install karna, theme aur Elementor se design karna, SEO setup aur finally apni site launch karna.
Aur ek bonus tip: Agar aap website ke sath-sath Digital Marketing bhi seekh lete ho to aap apni site ko Google ke first page par rank kara sakte ho. Iske liye aap Digital Marketing course join kar sakte ho jo aapke skills ko next level par le jayega.
क्यों Use करें WordPress अपनी Website के लिए?

Aaj ke time mein website banana ab mushkil kaam nahi raha, aur sabse easy aur powerful platform hai WordPress. Yeh beginners ke liye bhi perfect hai aur professionals ke liye bhi ekdum best choice.
1. Sabse Popular CMS (Content Management System)
Aaj duniya ke 40% se zyada websites WordPress par bani hui hain. Matlab har 4 websites me se ek WordPress par run karti hai. Yeh dikhata hai ki WordPress kitna trusted aur powerful platform hai.
2. Coding Knowledge ki Zarurat Nahi
Agar aapko coding nahi aati, to bhi aap easily apni professional website bana sakte ho. WordPress me thousands of free & paid themes aur plugins available hain jisse aap drag & drop karke stunning design create kar sakte ho.
3. Har Type ki Website ke liye Perfect
- Blog start karna chahte ho,
- Online Store (E-commerce site) banana chahte ho,
- Portfolio ya Business Website banana chahte ho,
WordPress aapko full flexibility deta hai. Aap jab chaho naye features add kar sakte ho — jaise payment gateway, contact forms, memberships, ya even online courses.
4. Huge Community & Easy Support
WordPress ki ek badi global community hai. Matlab agar aapko kabhi koi issue aaye, to aapko har jagah solutions mil jayenge — YouTube tutorials, forums aur support groups.
WordPress Website कैसे बनाएं
WordPress website banana shuru mein thoda मुश्किल लग सकता है, lekin agar aap step by step process follow karte ho toh aapki site easily chalne lagegi. Chaliye isko breakdown karte hain:
Step 1: Choose a Domain Name and Hosting Provider
- Domain name आपकी website का address on the web होता है (जैसे: www.digilearnix.in)
- ये aapke brand ya website ke purpose ko represent करना चाहिए।
- Domain name memorable (yaad rakhne laayak) होना चाहिए और कोशिश करें कि इसमें aapke niche ke keywords भी शामिल हों।
Example: अगर आपकी website digital marketing ke बारे में है, तो domain name में “digital” ya “marketing” जैसा शब्द होना चाहिए।
Web Hosting क्या होती है?
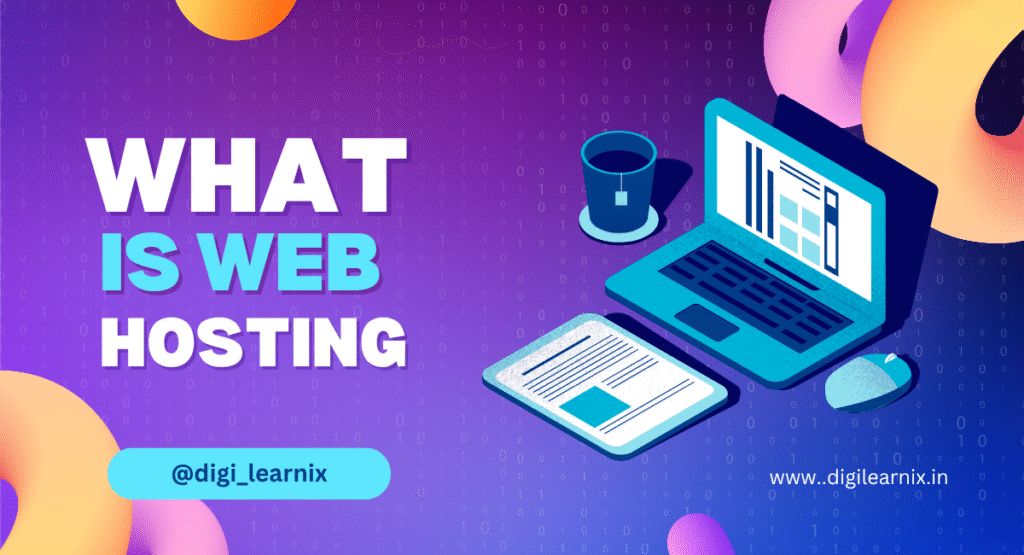
Hosting वो जगह है जहाँ आपकी website ka पूरा data (files, images, content, videos) safe रहता है। जब कोई user aapka domain (www.yourwebsite.com) type karta है, तो hosting server us data ko load karke user ko show karta hai.
Beginners के लिए Hosting क्यों ज़रूरी है?
- बिना hosting आपकी website live nahi ho sakti
- Hosting basically आपकी website ko internet pe connect करती है।
- सही hosting choose करने से website ki speed, security aur performance improve hoti है।
Beginners के लिए Best Hosting Provider
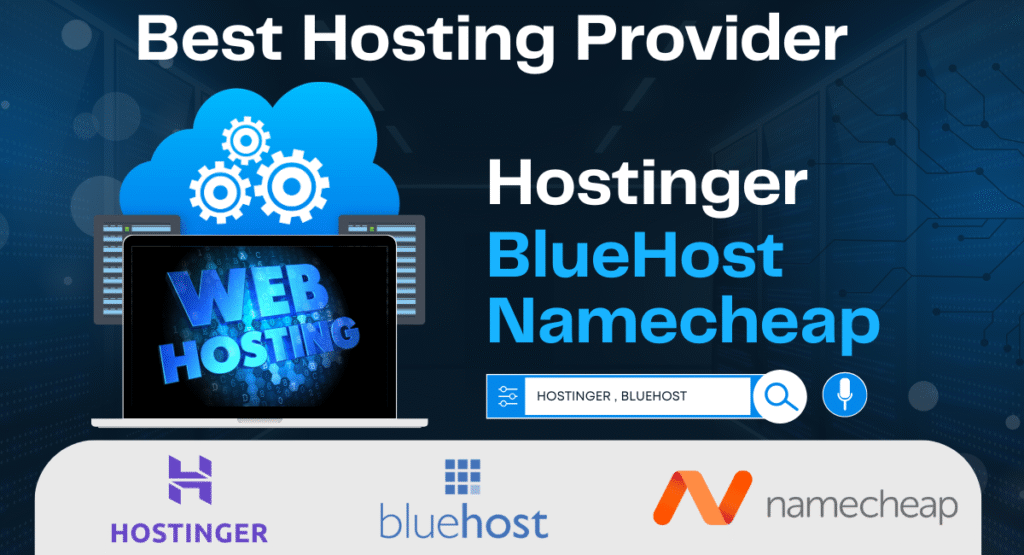
अगर आप अभी start कर रहे हो, तो shared hosting या WordPress optimized hosting best रहेगी।
Examples:
- Hostinger
- Bluehost
- Namecheap
Simple शब्दों में — Domain aapki website ka नाम है, और Hosting us ghar ki jagah hai jahan website rehti hai. दोनों मिलकर ही आपकी site को internet पर live karte hain
Step 2: Install WordPress
- ज़्यादातर hosting providers में WordPress install करने का 1-click option होता है।
- Hosting account में login करें और “Install WordPress” या “WordPress सेटअप” वाले section में जाएँ।
- वहाँ दिए गए simple prompts / steps फॉलो करें—जैसे site का नाम देना, admin username/password set करना आदि।
- कुछ ही मिनटों में आपका WordPress ready हो जाएगा और आप website बनाना शुरू कर सकते हैं।
Step 3: Choose and Install a Theme
- आपकी website का look & feel पूरी तरह theme पर depend करता है।
- WordPress में हजारों free aur paid themes available हैं।
- Beginners के लिए theme बहुत important होती है क्योंकि ये आपके लिए ज़्यादातर design work automatically कर देती है।
Theme कैसे Install करें?
- WordPress dashboard me login करें।
- Appearance > Themes > Add New पर जाएँ।
- यहाँ आप themes को popularity, layout ya niche (जैसे eCommerce, blogging, portfolio) के हिसाब से browse कर सकते हैं।
- जब आपको कोई theme pasand आए, उसपर click करके Install करें।
- WordPress dashboard me login करें।
Example:
- अगर आप blogging site बना रहे हो तो Astra, OceanWP, GeneratePress जैसी themes popular हैं।
- Agar eCommerce site banana hai toh Storefront ya Flatsome जैसी themes best हैं।
- Simple शब्दों में — Theme आपकी website की skin है। ये define करती है कि आपकी site users को कैसी दिखेगी।
Step 4: Customise
Theme install करने के बाद अब बारी आती है Customization की।
- WordPress में आप अपनी website को पूरी तरह customise कर सकते हो — जैसे colours, fonts, background, menus aur homepage layout।
- WordPress में आप अपनी website को पूरी तरह customise कर सकते हो — जैसे colours, fonts, background, menus aur homepage layout।
Customisation कैसे करें?
- WordPress dashboard me जाएँ।
- Appearance > Customise पर क्लिक करें।
- यहाँ से आप:
- Logo upload कर सकते हो।
- Colours & Fonts बदल सकते हो।
- Header & Footer edit कर सकते हो।
- Menus aur Homepage layout set कर सकते हो।
Advanced Customisation (Beginners ke liye easy)
अगर आपको aur ज्यादा control चाहिए, तो आप Page Builder Plugins use कर सकते हो।
Examples:
- Elementor → drag-and-drop से आसानी से pages design करने के लिए।
- WPBakery → professional style layouts बनाने के लिए।
इनकी help से aap bina coding knowledge के apni website को बिल्कुल custom design कर सकते हो।
Simple शब्दों में — Customisation से आपकी website unique aur brand-focused बनती है।
Step 5: Add Plugins
Plugins install करके अपनी website में extra features जोड़ें।
- Plugins basically छोटे-छोटे tools Software होते हैं जो आपकी WordPress site में नई functionality add karte hain।
- इनकी मदद से आप बिना coding knowledge के अपनी site में features add कर सकते हो।
Plugins कैसे Install करें?
- WordPress dashboard में जाएँ।
- Plugins > Add New पर क्लिक करें।
- Search bar में plugin का नाम डालें।
- Install और फिर Activate पर क्लिक करें।
Beginners के लिए Must-Have Plugins
- Yoast SEO → आपकी site को search engines (Google) के लिए optimise करता है।
- Elementor → drag-and-drop से आसानी से pages design करने के लिए।
- WPForms → Contact forms बनाने के लिए।
- UpdraftPlus → Website का backup लेने के लिए।
- Jetpack → Security और performance improve करने के लिए।
Simple शब्दों में: Plugins aapki website ke “apps” hote hain jo naye features add karke aapka kaam आसान bana dete हैं।
Step 6: Create Pages and Posts
WordPress में दो main content types होते हैं – Pages और Posts।
- Pages → Static होते हैं (जैसे Home, About, Contact)। ये ज़्यादा change नहीं होते।
- Posts → Dynamic content होते हैं (जैसे Blog articles, News updates)। ये regularly update किए जाते हैं।
Website Start करने के लिए Essential Pages
- Home Page → Visitors को आपकी site या business के बारे में first impression देता है।
- About Page → यहाँ आप अपनी story, mission aur background share करते हो।
- Services / Products Page → Aap kya offer karte ho, uski details.
- Contact Page → Visitors को आपसे connect होने का आसान तरीका देता है (form, email, phone number)।
New Page कैसे Create करें?
- Dashboard में जाएँ।
- Pages > Add New पर क्लिक करें।
- Page का title डालें (जैसे “About Us”)।
- Content add करें (text, images, video आदि)
- जब सब ready हो जाए तो Publish बटन पर क्लिक करें।
Simple शब्दों में: Pages आपकी site की structure बनाते हैं, और Posts आपकी site का regular content create करते हैं। दोनों मिलकर आपकी WordPress website को complete बनाते हैं।
Step 7: Enable SEO
SEO (Search Engine Optimisation) बहुत ज़रूरी है ताकि आपकी website Google जैसे search engines पर rank कर सके।
- SEO की मदद से आपकी site पर ज्यादा traffic आता है।
- Beginners के लिए सबसे आसान तरीका है Yoast SEO Plugin use करना
- SEO की मदद से आपकी site पर ज्यादा traffic आता है।
Yoast SEO क्या करता है?
- आपकी site के लिए meta tags add करता है।
- Content की readability aur keywords check करता है।
- Search engines को आपकी site samajhne में help करता है।
Simple शब्दों में: SEO आपकी website को Google friendly बनाता है।
- आपकी site के लिए meta tags add करता है।
Step 8: Secure Your WordPress Site

Security हर website के लिए ज़रूरी है, चाहे beginner हो या expert।
Website Secure कैसे करें?
- Security Plugin install करें
- Wordfence या Sucuri Security → इनमे firewall, malware scanning aur login protection जैसी features होते हैं।
- Wordfence या Sucuri Security → इनमे firewall, malware scanning aur login protection जैसी features होते हैं।
- WordPress core, themes aur plugins ko hamesha update रखें।
- Outdated software आपकी website के लिए सबसे बड़ा risk होता है।
- Outdated software आपकी website के लिए सबसे बड़ा risk होता है।
- Strong username & password रखें और “admin” default username कभी use न करें।
Simple शब्दों में: Website security का मतलब है अपनी site को hackers, viruses aur malware से safe रखना।
Step 9: Go Live
अब आपकी website almost ready है, बस final step बाकी है — Live करना!
Go Live करने से पहले क्या check करना है?
- अपनी site को अच्छे से preview करें।
- सब pages open करके देखें कि कहीं कोई error या missing element तो नहीं है।
- सारे links test करें (कोई broken link ना हो)।
- Contact forms ठीक से काम कर रहे हैं या नहीं, ये भी चेक करें।
जब सब कुछ सही लगे → बस Publish button दबाएँ।
अब आपकी website live ho जाएगी aur duniya dekh sakegi!
Next Step After Going Live
- अपनी site को Social Media पर share करें।
- Email newsletter में अपनी site का link भेजें।
- Audience को हर जगह inform करें ताकि traffic आना शुरू हो जाए।
अब आपका सवाल “How to Create a WordPress Website” यहीं पूरा होता है। आपकी WordPress site अब ready और live है!
What’s Next?
WordPress website बनाना beginners के लिए उतना मुश्किल नहीं है जितना लगता है।
अगर आप इस step-by-step guide को follow करते हो, तो आप आसानी से एक fully functional, professional website बना सकते हो।
- Domain name choose करने से लेकर site ko secure करने तक,
- WordPress आपको हर step पर easy tools देता है।
- Simple words में: WordPress beginners के लिए सबसे आसान और powerful platform है।